DIY Car Maintenance: A Step-by-Step Guide to Keeping Your Vehicle in Top Shape
If you're a car owner, you understand the importance of regular maintenance to keep your vehicle running smoothly and safely. However, trips to the garage for servicing can be costly and inconvenient. Why not consider performing basic car maintenance at home? Not only will you save money, but you'll also acquire new skills and gain greater control over the quality of the service.
In this comprehensive guide, we will walk you through the process of performing a basic car service at home using simple steps and common tools. A basic service typically involves changing the engine oil and filter, air filter, spark plugs, and inspecting various components like tires, brakes, belts, hoses, lights, and wipers for signs of wear or damage.
Before you embark on your DIY car maintenance journey, ensure you have the following items ready:
•A socket set, oil drain tray, screwdrivers, Allen keys, ramps, an old rag, and, of course, a cup of tea to keep you refreshed during your DIY adventure.
•Tools such as an oil filter remover and a spark plug removal socket.
•The right oil and oil filter, air filter, and spark plugs for your specific car model. •You can find this information in your owner's manual or by consulting your local car parts shop.
•A jack and jack stands or wheel chocks to safely lift and secure your vehicle.
•A tire pressure gauge and a tire inflator.
•Additional equipment like a funnel, measuring jug, plastic bottle, and rags or paper towels for handling fluids.
Now that you're well-prepared, let's dive into the steps for DIY car maintenance:
Step 1: Changing the Engine Oil and Filter
Engine oil plays a crucial role in lubricating your engine's moving parts and preventing overheating. Over time, oil becomes contaminated and loses its effectiveness, making regular oil changes necessary (typically every 6 months or 10,000 miles).
Here's how you can change the engine oil and filter at home:
Warm Up Your Engine: Start by idling or driving your car for a few minutes. This helps the oil flow out more easily.
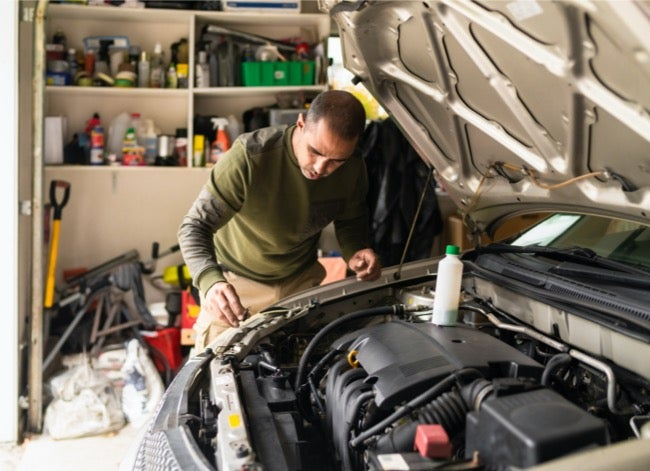
Prepare Your Vehicle: Park your car on a level surface and turn off the engine. Put on gloves and safety glasses for protection.
Lift Your Car: Use ramps or a jack and jack stands to lift the front of your car. If you're using a jack, secure the vehicle with wheel chocks.
Access the Engine: Open the hood and locate the oil filler cap on top of the engine. Unscrew it and set it aside.
Drain the Oil: Place the oil drain tray under the oil drain plug at the engine's bottom. The drain plug is usually a bolt or hexagonal nut that you can loosen with a wrench or Allen key.
Remove the Drain Plug: Carefully loosen the drain plug with the appropriate tool. Be prepared for hot oil to flow out. Allow the oil to drain completely into the tray.
Replace the Drain Plug: After draining, replace the drain plug and tighten it securely. Avoid over-tightening to prevent damage to the threads.
Change the Oil Filter: Position the tray under the oil filter. The oil filter typically looks like a cylindrical metal canister attached to the side or bottom of the engine. You may need an oil filter remover tool to unscrew it.
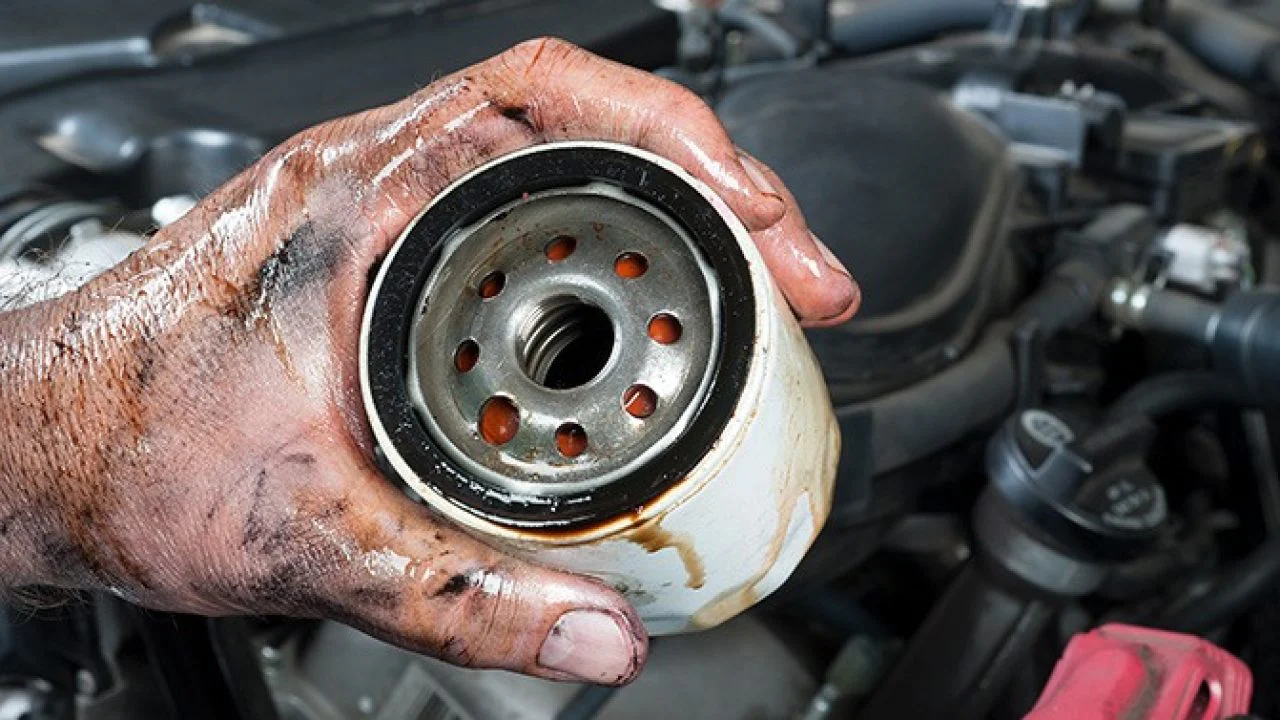
Replace the Oil Filter: Carefully unscrew the oil filter with the tool. Some oil may spill as you remove it. Dispose of the old filter properly.
Prepare the New Filter: Wipe off any dirt or oil from the filter mounting area with a rag. Apply a thin layer of new oil to the rubber seal of the new filter using your finger.
Install the New Filter: Screw on the new filter by hand until it's snug. Avoid using a tool, as over-tightening can cause issues.
Add New Oil: Use a funnel to pour the new oil into the oil filler hole on top of the engine. Refer to your owner's manual or consult your car parts shop for the correct oil type and quantity.
Replace the Oil Filler Cap: Secure the oil filler cap and wipe off any spills with a rag.
Lower Your Car: Remove the ramps or jack stands and lower your car.
Check for Leaks: Start the engine and let it run for a few minutes. Inspect under your car and around the filter area for any oil leaks. If you spot leaks, turn off the engine and tighten the drain plug or filter as needed.
Check Oil Level: Turn off the engine and use the dipstick to check the oil level. The dipstick is typically a metal rod with a ring handle near the oil filler cap. Wipe it clean with a rag, reinsert it fully, then pull it out again. The oil level should fall within the recommended range in your owner's manual.
By following these steps, you've completed a fundamental yet critical aspect of car maintenance: changing the engine oil and filter. Regular oil changes help prolong your engine's life and maintain its optimal performance.
Next, we'll delve into other essential aspects of DIY car maintenance, so you can keep your vehicle running smoothly without breaking the bank. Stay tuned for more tips on air filter replacement, spark plug maintenance, and tire care in Part 2 of our DIY Car Maintenance Guide.
Remember, taking control of your car's maintenance not only saves you money but also empowers you with valuable automotive skills. Happy servicing!